In the world of beauty and cosmetic enhancements, the pursuit of perfectly plump lips has led to an explosion of options, from temporary makeup tricks to long-lasting injectable treatments. Among the more subtle, natural-looking options is the Lip Flip, a procedure that has surged in popularity. However, for those hesitant about needles, cost, or commitment, the concept of a “DIY Lip Flip”—achieving a similar visual effect at home—presents an enticing, low-risk alternative.
This comprehensive guide dives deep into the professional Lip Flip procedure, analyzes the realistic expectations for at-home mimicry, and provides actionable, expert-level techniques to create the illusion of a fuller, more defined upper lip without a single injection.
The Professional Lip Flip: What Is It Really?
Before attempting to replicate the look at home, it’s crucial to understand the mechanism behind the professional treatment. A true Lip Flip is a non-surgical cosmetic procedure performed by a licensed professional, typically a dermatologist or plastic surgeon, using Botulinum Toxin (like Botox, Dysport, or Xeomin).
Mechanism of Action
Unlike traditional dermal fillers, which physically add volume to the lips with substances like hyaluronic acid, the Lip Flip works by muscle relaxation and subtle repositioning.
A. Targeted Injection: Tiny amounts of the neurotoxin are strategically injected into the orbicularis oris muscle, specifically the parts responsible for the upper lip’s movement. These injections are placed along the upper lip border (vermilion border) and sometimes near the Cupid’s bow.
B. Muscle Relaxation: The toxin temporarily blocks nerve signals to the muscle fibers. This relaxation prevents the upper lip from curling inward and thinning out—a common occurrence when people smile or speak.
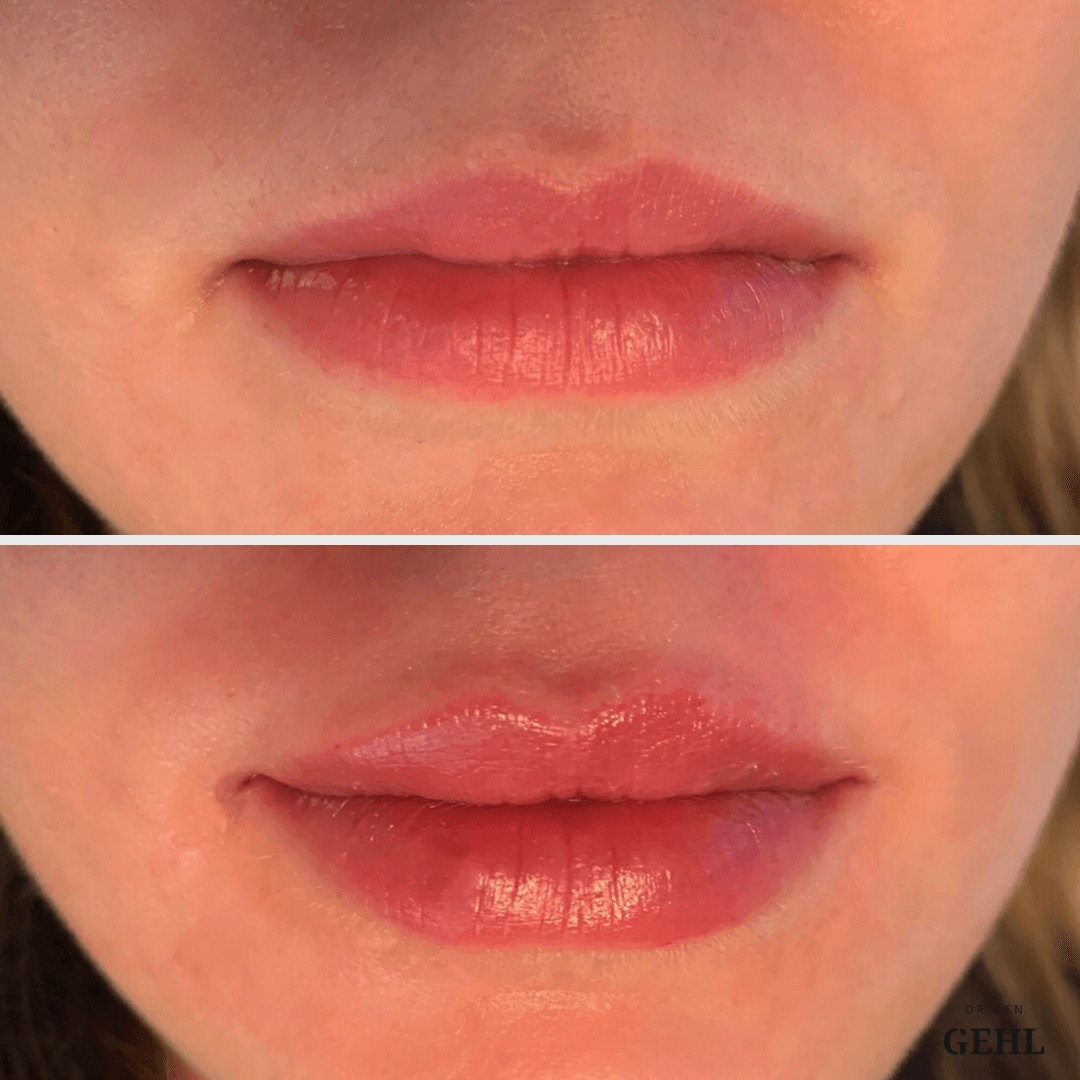
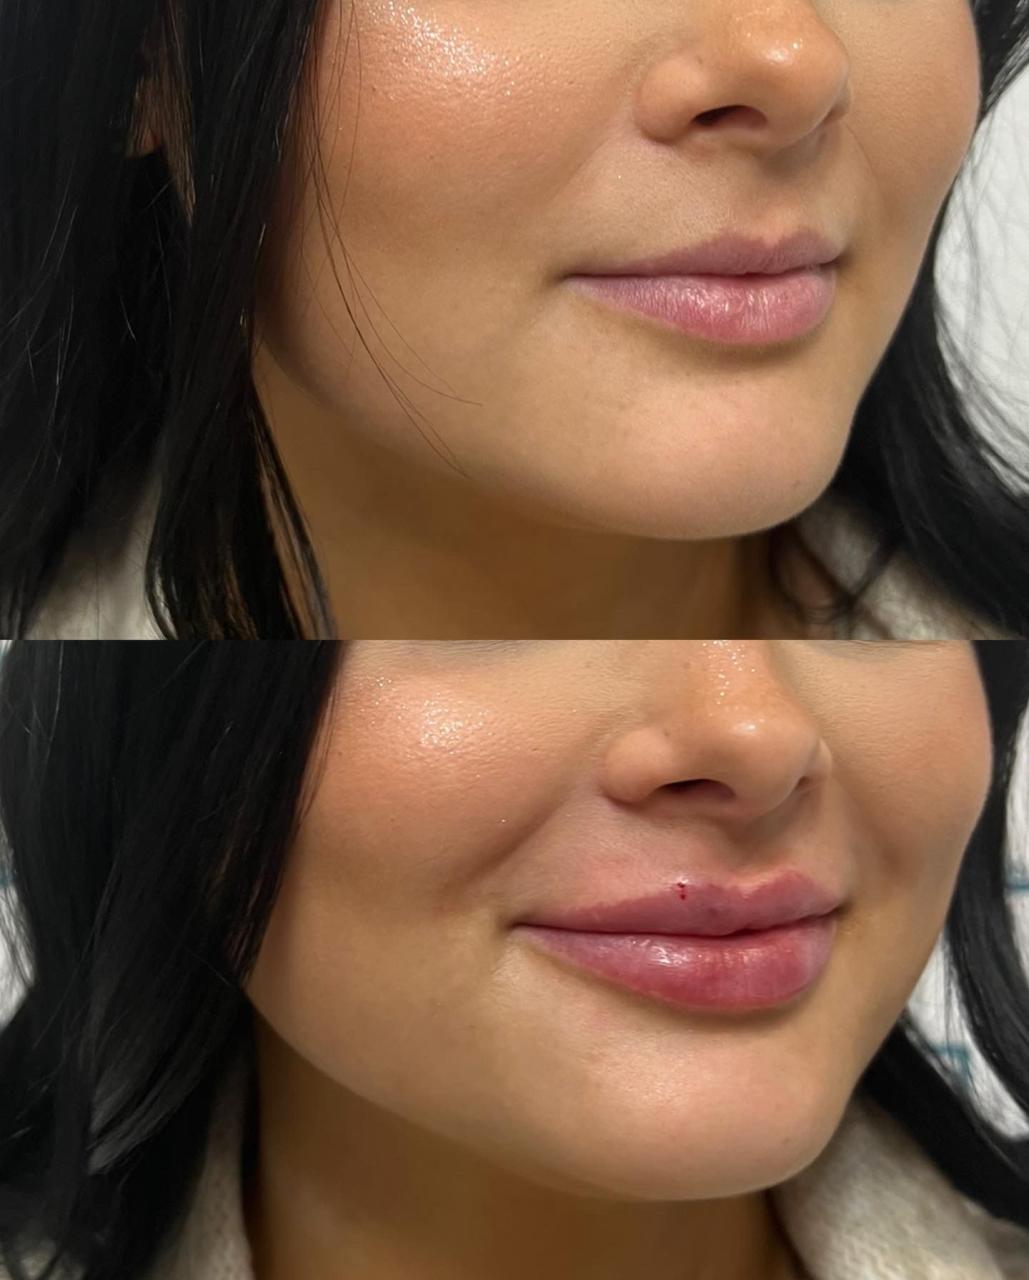
C. Subtle “Flip”: By relaxing the muscle, the upper lip gently “flips” or rolls outward slightly. This eversion reveals more of the inner pink vermilion tissue, creating the optical illusion of a fuller, poutier upper lip without adding any physical volume.
Key Benefits of the Professional Procedure
The genuine Lip Flip offers specific aesthetic advantages that make it distinct from lip fillers:
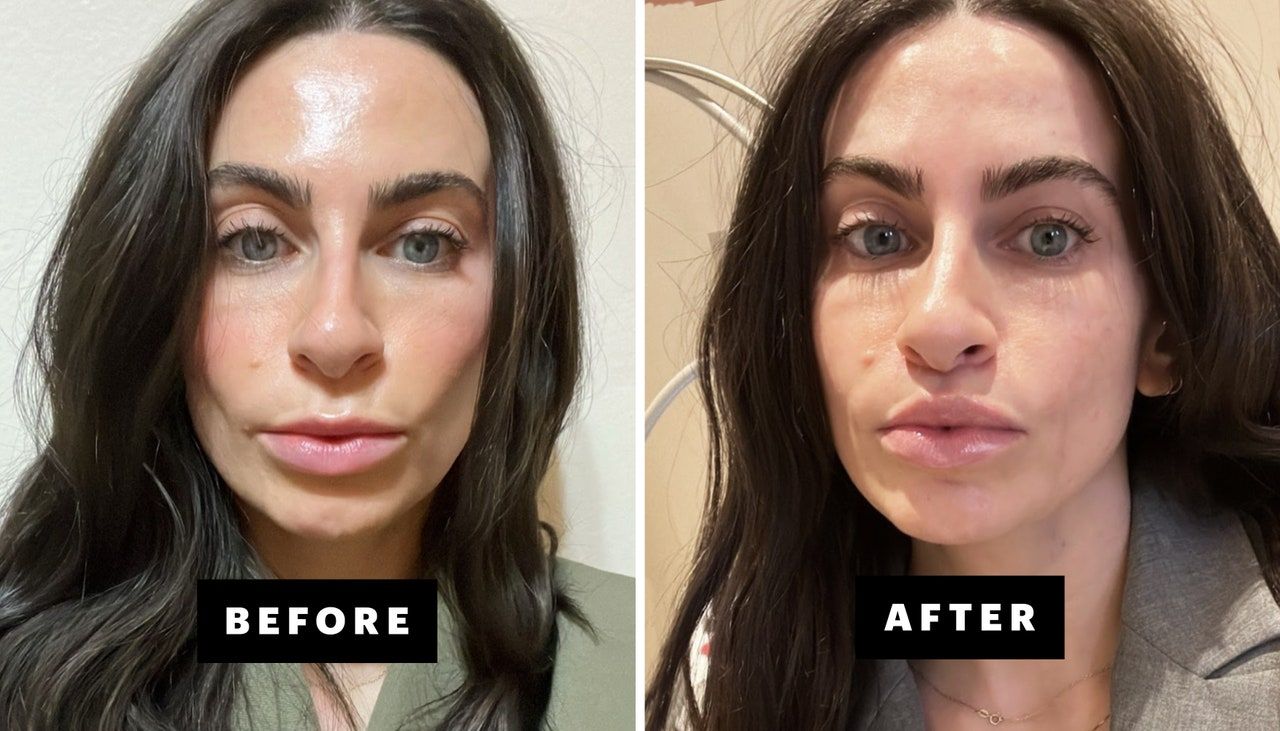
A. Natural-Looking Enhancement: The results are subtle, avoiding the over-filled or “duck lip” look that can sometimes occur with aggressive filler use. It simply enhances your natural lip shape.
B. Addressing a “Gummy Smile”: For individuals whose upper lip pulls up excessively when they smile, revealing too much gum tissue, the Lip Flip can relax those muscles, allowing the lip to drop slightly and reduce the appearance of a gummy smile.
C. Cost-Effective: It typically requires fewer units of botulinum toxin than other facial treatments, making it a more affordable, non-surgical option compared to a full syringe of lip filler.
D. Minimal Downtime: The procedure is quick, often taking less than 15 minutes, with little to no recovery time, though minor bruising or swelling can occur.
Drawbacks and Longevity
It is important for consumers to note the temporary nature of this treatment.
A. Shorter Duration: Due to the constant movement of the mouth muscles (talking, eating, kissing), the effects of the Lip Flip generally last a shorter time—typically 2 to 4 months, compared to 6 to 12 months for most hyaluronic acid fillers.
B. Temporary Functional Changes: In the first few days, some individuals may experience minor difficulty with activities that require strong lip pursing, such as drinking through a straw, whistling, or correctly pronouncing certain words (like those with ‘P’ or ‘B’ sounds). This is temporary and usually resolves as the toxin fully settles.
C. Subtlety May Disappoint: If a patient desires significant volume increase, a Lip Flip alone may not be sufficient, and a combination with dermal filler may be necessary.
Decoding the “DIY Lip Flip” Effect
Given the medical nature and risks associated with injecting neurotoxins, a true professional Lip Flip can never be performed at home. The “DIY Lip Flip” refers to a collection of safe, non-invasive techniques—primarily through makeup, skincare, and simple exercises—used to visually mimic the effect of a subtly lifted, fuller upper lip. These methods aim to capitalize on the principles of light, shadow, and hydration to create an optical illusion.
Plumper Lips: At-Home Techniques
Achieving the DIY Lip Flip effect requires a multi-faceted approach, focusing on enhancing your lip’s natural color, shape, and surface texture.
I. Advanced Lip Care and Surface Preparation
The foundation of any perceived fullness is healthy, smooth, and hydrated lips. Dry, flaky lips absorb light, making them appear smaller. Hydrated lips reflect light, immediately making them look plumper.
A. Exfoliation for Volume and Color
Regular, gentle exfoliation removes dead skin cells, immediately enhancing the lip’s natural color and creating a smoother canvas.
- Physical Scrub: Use a simple mixture of fine sugar and a moisturizing oil (like coconut or olive oil). Gently rub the mixture onto your lips in a circular motion for about 60 seconds using your fingertip or a soft toothbrush. Rinse well.
- Frequency: Limit exfoliation to 1-2 times per week to avoid irritating the delicate skin.
- The Circulation Boost: The act of massaging and scrubbing increases blood circulation to the area, giving the lips a temporary, natural flush and plumpness.
B. Intense Hydration and Barrier Protection
Hydration keeps the lips from shriveling, while barrier protection locks the moisture in.
- Humectant Layer: Products containing Hyaluronic Acid (HA) or Glycerin should be applied first. HA is a humectant that draws moisture from the environment into the skin, temporarily making the surface look fuller. Look for dedicated HA lip serums.
- Occlusive Seal: Follow the humectant layer with a thick occlusive agent like a petrolatum-based balm, raw cocoa butter, or a rich lip mask. This creates a barrier to prevent the newly drawn-in moisture from evaporating, ensuring long-lasting suppleness.
- Internal Hydration: Never underestimate the role of water intake. Dehydration impacts the entire body, and the lips are one of the first areas to show dryness. Aim for consistent, adequate water consumption throughout the day.
C. The Plumping Tingle: Topical Lip Plumpers
Lip plumpers work by causing a temporary, mild irritation (often a tingling or stinging sensation) that boosts blood flow to the surface of the lips, causing them to swell slightly.
- Common Ingredients: Look for products containing ingredients like Cinnamon Oil, Peppermint Oil, Capsaicin (from chili/cayenne pepper), or Nicotinate.
- Mechanism: While effective for a quick, temporary lift, they do not offer the subtle, muscle-relaxing effect of the professional flip. They simply induce a temporary, controlled inflammatory response.
- DIY Plumper Recipe: For a quick home solution, mix a few drops of Peppermint Essential Oil or a tiny pinch of Cayenne Pepper Powder into your clear lip gloss or balm. Always patch test first and use caution to avoid irritation.
II. The Makeup Artistry “Flip” Techniques
Makeup is the most powerful tool for creating the optical illusion of a professional Lip Flip by playing with light, shadow, and strategic overlining. This method requires precision for a natural look.
A. Strategic Overlining: The Master of Illusion
This is the core technique to mimic the outward “roll” of the Lip Flip.
- Select the Right Tools: Use a lip liner that matches your natural lip color or is a shade deeper. A pencil with a slight brown undertone can enhance the shadow effect. A fine-tipped, well-sharpened pencil is essential for precision.
- The Outline Foundation: Start by outlining the natural border of your entire bottom lip and the lower edges of your upper lip as usual.
- The Upper Lip “Flip”: This is where the magic happens.
- Cupid’s Bow: Instead of lining on the natural dip of the Cupid’s bow, slightly overline the highest point of the “M” shape, lining just above the vermilion border.
- The Corners: Do not overline near the corners of the mouth; this can look unnatural and messy. Stick to your natural lip line here.
- The Center: Connect the overlined Cupid’s bow to the corners, drawing a line that remains just outside the natural lip line—no more than a pencil-tip’s width past the border, focusing this overline primarily in the center of the upper lip.
- Blending: Lightly fill in the center of the lips with the liner, then blend the edges of the liner inward with a lip brush or clean fingertip. This creates a softer transition.
B. Contouring for Dimensionality
Contouring adds depth and shadow, crucial for making the upper lip appear to project outward.
- Create the Shadow: Use the same lip liner, or a cool-toned contour product (like a brow powder or shadow) that is 1-2 shades deeper than your skin tone.
- Placement: Lightly trace a thin line just beneath the bottom lip’s center. Blend this line downward with a small, fluffy brush. The shadow underneath makes the lower lip look heavier and more projected, which balances the “flipped” upper lip.
- Highlight the Philtrum: Apply a small amount of a matte or very subtle shimmer highlighter to the two vertical grooves (the philtrum) that run from your Cupid’s bow up to your nose. This draws light to the center of the upper lip, further accentuating the upward lift.
C. The Light Reflector Finish
The final step is to use light to maximize the fullness effect.
- Color Selection: Use a lipstick or gloss that is slightly lighter than your liner to fill in the rest of the lip. Lighter colors reflect light and make things appear closer and larger.
- Central Gloss: Apply a small dab of high-shine, clear or shimmery gloss only to the very center of both the upper and lower lips. The intense reflection here creates a focal point of fullness, mimicking the pouty look of the professional flip.
III. Facial Exercises and Muscle Activation
While not a replacement for a neurotoxin, specific facial exercises can promote muscle tone and increase blood flow to the orbicularis oris muscle over time, potentially giving the lips a more defined appearance.
A. The Pout and Hold
- The Action: Purse your lips tightly into a strong pout, as if you are blowing a kiss or trying to whistle.
- The Hold: Hold this maximum contraction for 5-10 seconds.
- Repetition: Repeat this 10-15 times.
B. Resistance Kiss
- The Action: Place your fingers flat around your mouth, pressing gently to create resistance.
- The Kiss: Try to “kiss” or pout against the pressure of your fingers.
- The Hold: Maintain the resistance for 5 seconds.
- Repetition: Repeat this movement 10 times. This helps to strengthen and define the muscle that the professional Lip Flip targets to relax.
Lip Flip vs. Lip Filler: A Crucial Distinction
It is vital for the consumer to understand the difference between the two most common injectable lip treatments, as their effects are often confused.
Final SEO Takeaways for the DIY Lip Flip Effect
The DIY Lip Flip is a safe, non-invasive method that uses the artistry of makeup and the science of skincare to create the appearance of a lifted, pouty upper lip. While it cannot replicate the true muscle relaxation of a professional injectable procedure, the combined techniques of exfoliation, intense hydration, precise overlining, and subtle contouring offer a powerful visual transformation.
For those considering a professional treatment, starting with the DIY method is an excellent way to “test drive” the look and better understand your aesthetic goals before committing to needles and expense. Always prioritize safety, and if you choose the professional route, select an experienced, board-certified injector.
The key to long-term success with the DIY Lip Flip effect is consistency in lip care and precision in makeup application. Master these techniques, and you can enjoy the look of plumper, perfectly flipped lips every day.