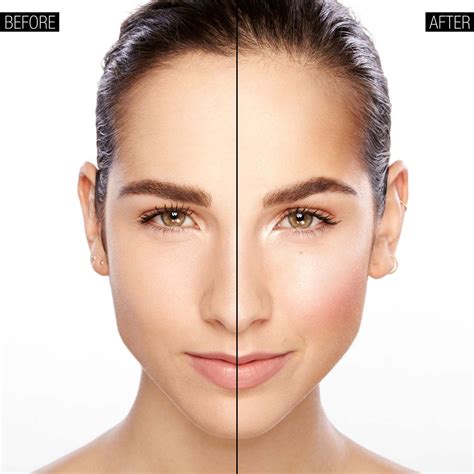
In the endless pursuit of a fresh, youthful, and sculpted appearance, many have explored everything from expensive skincare to invasive cosmetic procedures. But what if the secret to a more lifted, revitalized look wasn’t in a syringe or under a surgeon’s knife, but waiting inside your makeup bag? The answer lies in a revolutionary approach to a timeless product: blush. Forget everything you thought you knew about applying color to the apples of your cheeks. A new wave of viral blush hacks, born on social media and perfected by celebrity makeup artists, has unlocked the power to create a stunning, non-surgical facelift with just a few artful sweeps of color.
This is not just another fleeting beauty trend. It’s a fundamental shift in understanding the architecture of the face and using color to create a powerful optical illusion. By strategically placing blush higher on the facial plane, you can draw the eye upward and outward, effectively counteracting gravity and creating the illusion of higher cheekbones and a more defined facial structure. This technique is more than just adding a healthy flush; it’s a form of soft-sculpting that delivers an immediate and noticeable lift.
This comprehensive guide will serve as your masterclass in the art of the blush facelift. We will delve into the science behind why this technique works, explore multiple viral methods step-by-step, and equip you with the knowledge to choose the perfect products and tools. We’ll also highlight the common mistakes that can inadvertently drag your features down and provide professional tips to ensure your lifted look is flawless and long-lasting. Prepare to transform your makeup routine and unleash the lifting power of blush.
The Science and Psychology of a “Lifted” Look
Why are we so drawn to high cheekbones and an upward-swept look? The answer is rooted in the psychology of beauty and the science of perception. Universally, features that curve upward are associated with youth, positivity, and vitality. As we age, gravity, along with a decrease in collagen and elastin, causes facial tissues and fat pads to descend, leading to sagging and a heavier lower face.
Makeup, at its core, is the art of manipulating light and shadow to create optical illusions. The “blush facelift” leverages this principle to its fullest potential.
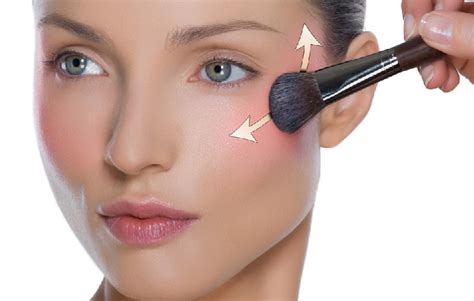
- Counteracting Gravity: Traditional blush application—smiling and popping color onto the “apples” of the cheeks—places the focal point low on the face. When you stop smiling, that circle of color can droop, visually pulling your features down. The new method places pigment on the highest points of the cheekbones, near the outer corner of the eye, creating a vector of energy that directs the viewer’s gaze up and out, away from the center and lower parts of the face.
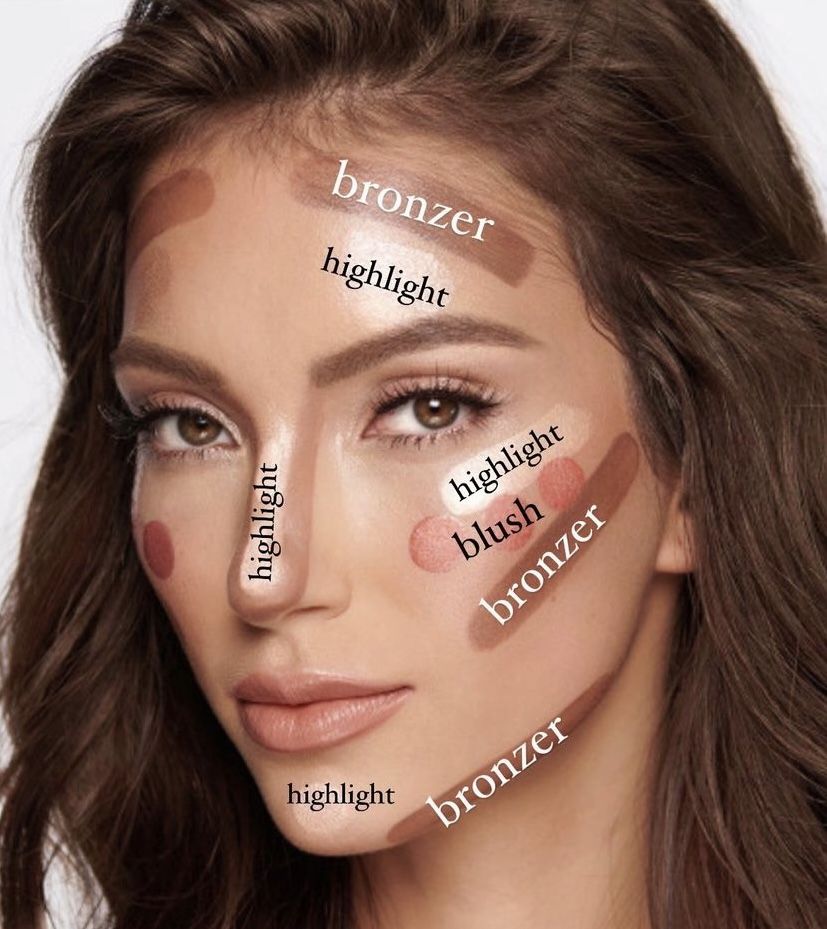
- Creating Angularity and Definition: By concentrating color along the upper ridge of the cheekbone and blending it towards the temple, you are essentially faking a higher bone structure. This creates a shadow in the hollows of the cheeks without the need for harsh contouring products. The pop of color at the high point works like a highlight, making the cheekbone appear more prominent and sculpted, which is a hallmark of a youthful facial structure.
The Foundation of Flawlessness: Prepping Your Canvas
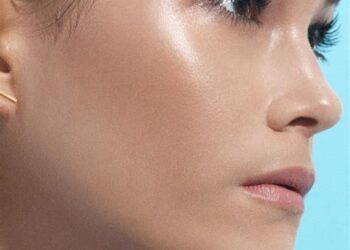
Before a single drop of blush touches your skin, the preparation of your canvas is paramount. A lifted look must appear seamless and radiant, as if the glow is emanating from within. Skipping these foundational steps can result in a patchy, uneven application that detracts from the desired effect.
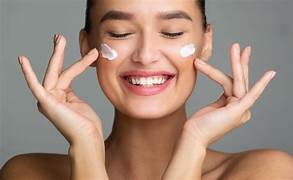
A. Hydration is Non-Negotiable: Makeup adheres best to skin that is plump, smooth, and well-hydrated. Begin with a clean face and apply a moisturizer suited to your skin type. For an extra boost of radiance, consider a hydrating serum containing ingredients like hyaluronic acid. This ensures that cream or liquid blushes will melt into the skin rather than sitting on top of it.
B. Prime for Perfection and Longevity: A high-quality primer is the bridge between your skincare and your makeup. A smoothing or pore-filling primer can create an impeccably even surface, preventing blush from settling into fine lines or texture. A gripping primer will ensure your meticulously placed blush stays locked in its lifted position all day long without fading or sliding.
C. Create an Even Base: Whether you prefer a full-coverage foundation or a lightweight skin tint, applying your base before your blush (unless you’re “underpainting”) is crucial. An even, flawless base neutralizes any natural redness or discoloration in your skin, allowing the blush color you apply to be true to its shade and pop effectively. This ensures the lifted effect is the star of the show, without any competing distractions.
Mastering the Viral Blush Lifting Techniques
This is where the magic happens. Several viral techniques have emerged, each offering a slightly different take on the lifting principle. Experiment with them to see which best suits your face shape and desired outcome.
A. The Classic “Upward C” Lift (Draping): This is the foundational technique and the most universally flattering. It involves applying blush in a C-shaped motion from the cheekbone to the temple.
- Find Your Placement: Instead of the apple of your cheek, locate the high point of your cheekbone, roughly in line with the outer corner of your eye. This is your starting point.
- Apply the Product: Smile softly to make the area taut. Apply a small amount of your chosen blush (cream, liquid, or powder) to this high point.
- Blend Up and Out: Using a dense brush, a damp sponge, or your fingers, begin blending the blush upwards and outwards along the cheekbone.
- Form the “C” Shape: Continue blending the color up towards your temple and the side of your forehead, creating a soft, diffused “C” shape. This continuous flow of color seamlessly lifts the entire side of your face.
- Pro Tip: You can even add a tiny bit of the remaining blush on your brush to the outer corner of your eyelid crease to create a harmonious, monochromatic lift.
B. The “Underpainting” Method for a Natural Glow: Popularized by celebrity makeup artists, this technique involves applying blush before your foundation for a truly natural, lit-from-within look.
- Apply Boldly: On your prepped, moisturized skin, apply a generous amount of a vibrant cream or liquid blush in the “Upward C” placement described above. Don’t be shy with the color—it should look quite intense at this stage.
- Blend the Edges: Softly blend the edges of the blush so there are no harsh lines.
- Apply Foundation Over Top: Using a stippling brush or a damp beauty sponge, gently tap and press your foundation over the blush and the rest of your face. Do not use wiping or rubbing motions, as this will smear the blush underneath.
- Reveal the Glow: The foundation will soften the intensity of the blush, creating a perfectly diffused, seamless flush of color that appears to be radiating from beneath your skin in the exact lifted position you placed it.
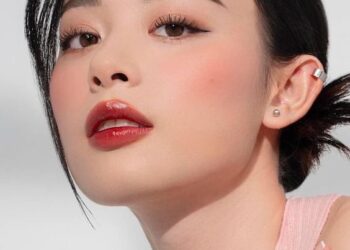
C. The Douyin/Under-Eye Blush for Youthful Fullness: This trend from Asia focuses on creating a youthful, ingenue-like appearance by placing blush higher and more centrally on the face.
- Central Placement: Apply a dot of blush on the very top of your cheekbone, directly underneath your pupil when looking straight ahead.
- Add Surrounding Dots: Place smaller dots of blush around this central point: one towards your nose, one towards your temple, and one on the bridge of your nose.
- Blend Together: Using a sponge or your fingers, blend these dots together. The effect concentrates the color high on the cheeks, mimicking the natural flush of youth and creating a lifted, “doll-like” fullness that is incredibly flattering.
Choosing Your Tools: Formulas and Brushes
The success of your blush facelift is heavily dependent on the products and tools you use. The right formula can make blending a dream, while the right tool ensures precise application.
A. Formula Matters: Cream vs. Liquid vs. Powder:
- Creams and Liquids: These are generally the top choice for lifting techniques. They melt into the skin, providing a seamless, skin-like finish that looks incredibly natural. They are forgiving, easy to blend with fingers or tools, and perfect for the “underpainting” method.
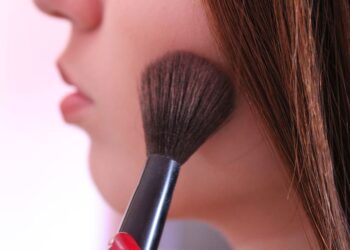
- Powders: Powder blushes are fantastic for longevity and for setting cream or liquid products. A finely milled powder can be swept on for a soft-focus, lifted look. They are best applied with a brush for maximum control.
B. Selecting the Perfect Lifting Shade: For a lifting effect, opt for shades that impart brightness and vitality. Peachy, pink, and coral tones work wonderfully. Avoid deep, muddy, or brown-toned blushes for this technique, as they can look more like a contour and may not provide the same youthful “pop” of color when placed high on the face.
C. The Essential Application Tools:
- Angled Blush Brush: The slanted bristles of this brush hug the cheekbone perfectly, making it ideal for the “Upward C” powder blush application.
- Stippling Brush or Damp Sponge: These are the heroes of cream and liquid blush. They allow you to press and tap the product into the skin without moving your base makeup, resulting in a flawless, airbrushed finish.
- Your Fingers: Don’t underestimate the power of your own hands. The warmth of your fingertips is excellent for melting cream blushes into the skin for a quick and natural blend.
Common Mistakes That Can Drag Your Face Down
Even with the best intentions, a few common errors can sabotage your lifting efforts. Being aware of these pitfalls is key to achieving a flawless result.
A. The Smile and Apply Myth: The single biggest mistake is smiling to find the “apples” of your cheeks and applying blush there. The moment your face relaxes, the position of that apple drops, and your blush drags your entire look down with it. Always apply blush while your face is in a neutral, relaxed position.
B. Starting Too Low: The golden rule of the blush facelift is to keep all color above the hollow of your cheek. Never bring the blush down into the area where you would typically apply contour. A good guide is to imagine a line from the corner of your mouth to the top of your ear and keep all blush above that line.
C. Harsh, Unblended Lines: A visible stripe of color is the enemy of a natural lift. Blending is everything. Ensure the edges of your blush are soft and diffused, seamlessly melting into your skin and foundation. Remember the mantra: blend up and out.
D. Using Shimmer in the Wrong Place: While a touch of shimmer on the very peak of the cheekbone can be beautiful, avoid using a heavily frosted blush for this entire technique. Shimmer emphasizes texture, and if you have fine lines or crow’s feet near your temples, a shimmery blush will only draw unwanted attention to them.
Elevate Your Artistry
The power to sculpt, lift, and rejuvenate your face is truly at your fingertips. By moving beyond outdated rules and embracing a strategic, upward placement, blush transforms from a simple pop of color into a sophisticated contouring tool. The viral blush facelift is more than a hack; it’s a testament to the transformative power of technique and understanding the unique architecture of your own face.
Whether you choose the classic “Upward C,” the subtle “Underpainting” method, or the youthful Douyin placement, the core principle remains the same: think up. Experiment with different formulas, find the shades that make you feel vibrant, and master the art of blending. By incorporating this simple yet profound shift in your makeup routine, you can achieve a fresher, more lifted look that radiates health and confidence, proving that sometimes the most impactful changes come from the smallest adjustments.