Finding the perfect foundation is often seen as the holy grail of makeup. The right shade can instantly unify your skin tone, blur imperfections, and provide a radiant base for the rest of your look. The wrong one, however, can leave you looking ashy, orange, or unnatural. With countless shades, undertones, and finishes on the market, the process can feel overwhelming. This comprehensive guide will break down the science of finding your perfect foundation match, from understanding your skin’s unique characteristics to mastering the art of testing and application.
Step 1: Unlocking Your Skin’s Secrets
Before you even think about picking up a bottle of foundation, you need to understand your skin. Two key factors are crucial for a perfect match: your skin tone and your undertone.
A. Identifying Your Skin Tone
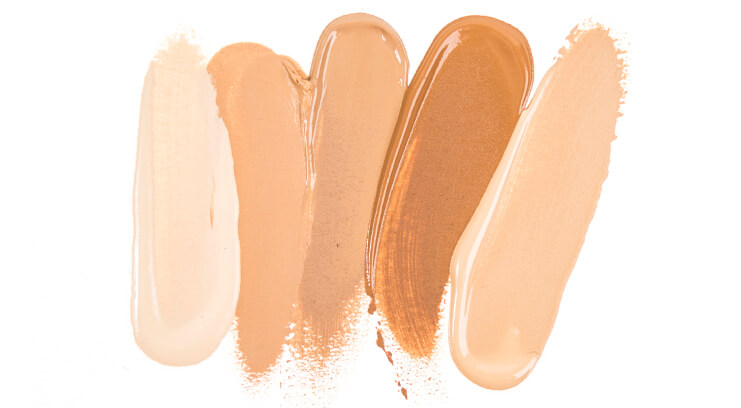
Your skin tone is the surface color of your skin, ranging from fair to deep. While it can be influenced by sun exposure and other factors, it’s generally categorized into a spectrum. Don’t worry about being too specific; brands often group shades into categories like “light,” “medium,” “tan,” and “deep.”
B. Discovering Your Undertone: The Most Crucial Step
Your undertone is the subtle hue beneath the surface of your skin. It doesn’t change with sun exposure and is the key to ensuring your foundation looks like a second skin, not a mask. There are three main undertones:
- Cool Undertones: Your skin has hints of pink, red, or bluish tones. Your veins often appear blue or purple on your wrist. You might get sunburned easily. Foundations for cool undertones often have a “C” or “R” (for Rose) in their shade name.
- Warm Undertones: Your skin has hints of golden, peachy, or yellow tones. Your veins often appear green or olive. You tend to tan easily without burning. Foundations for warm undertones often have a “W” or “Y” (for Yellow) in their shade name.
- Neutral Undertones: Your skin has a mix of both pink and golden tones. Your veins may appear a mix of both blue and green, making it hard to tell. You tend to tan without much trouble but can also get sunburned. Foundations for neutral undertones often have an “N” in their shade name.
Tip: Still not sure? Another simple trick is to look at how your skin reacts to gold and silver jewelry. If gold jewelry makes your skin glow, you likely have warm undertones. If silver jewelry makes your skin look more vibrant, you likely have cool undertones. If both look good, you have a neutral undertone.
Step 2: Navigating Foundation Formulas and Finishes

Once you know your tone and undertone, it’s time to consider the type of foundation that will work best for your skin type and desired look.
A. Common Foundation Formulas
- Liquid Foundation: The most popular choice, offering a wide range of coverage from sheer to full. It’s suitable for most skin types, especially when you choose a formula with a finish that matches your skin.
- Powder Foundation: Best for oily or combination skin, as it helps to absorb excess oil and provides a matte finish. It offers buildable coverage and is great for touch-ups.
- Stick Foundation: A creamy, solid formula that provides medium to full coverage. It’s excellent for on-the-go application and spot concealing. Best for normal to dry skin.
- Tinted Moisturizers and BB/CC Creams: These are lightweight, multi-tasking products that offer sheer coverage with added skincare benefits like hydration and SPF. Perfect for a “no-makeup makeup” look.
B. Understanding Finishes
The finish of a foundation dictates how it will look on your skin.
- Matte: Provides a shine-free, velvety look. Ideal for oily skin as it helps control shine.
- Satin/Natural: The most common finish, offering a soft glow that mimics the look of healthy skin. Suitable for most skin types.
- Dewy/Radiant: Leaves a luminous, glowing finish. Perfect for dry or mature skin to provide a healthy, hydrated look.
Step 3: The Art of Testing: Where to Swatch

This is where many people make mistakes. Swatching on the back of your hand is not the best method, as the skin on your hand is different from your face.
A. The Jawline Test
The best place to test a foundation shade is on your jawline. Apply a small stripe of a few potential shades and blend them out slightly. The shade that disappears into your skin is your perfect match.
B. The Rule of Three
Choose three shades that look close to your skin tone: one that looks slightly too light, one that looks slightly too dark, and one that looks like a good match. This will help you pinpoint the best shade without having to try too many.
C. The Natural Light Check
Never make a final decision under the harsh, fluorescent lights of a store. The lighting can drastically alter how the color appears. Always step outside or stand near a window to check the shade in natural light.
Step 4: Application Techniques
Once you’ve found your perfect foundation, the right application technique is key to making it look flawless.
A. Prep is Everything
Start with a clean, moisturized, and primed face. A good moisturizer and primer will create a smooth canvas, ensuring the foundation glides on effortlessly and lasts all day.
B. Tools of the Trade
- Sponges: For a dewy, natural finish. Use a damp sponge to bounce the foundation onto your skin, building coverage as you go.
- Brushes: For more controlled application and higher coverage. Use a dense, flat-top brush for buffing in product or a stippling brush for a lighter, more airbrushed finish.
- Fingers: For a sheer, natural look. The warmth from your fingers helps to melt the product into your skin.
Finding your perfect foundation match is a process of understanding your skin and taking the time to test products correctly. By following these steps, you can confidently choose a foundation that not only looks beautiful but also feels like it was made just for you.